Thanks for your question Peter. As you can imagine tiling a shower or wetroom is one of the most common jobs for installers and provides the added challenge of waterproofing – or tanking as it’s sometimes known.
Waterproofing is absolutely crucial to ensure a water tight barrier is formed to protect against water penetration into water sensitive backgrounds such as plaster or plasterboard often found in bathrooms or wet rooms.
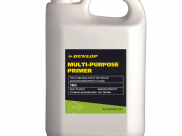
Dunlop’s Shower Waterproofing Kit has been especially designed to make the job of waterproofing a shower area quick and easy. Simple use a brush or roller to apply the Waterproof Primer to the shower area walls (and floor if required) to the full height and leave to dry. Take the coating and paint any areas which require tape such as internal/external wall corners, along the tray or floor junctions, pipe, penetrations and outlets. Cut the Waterproof Tape to the required length and push into the wet coating – just remember to ensure there are no voids left behind the tape!
Now apply a second layer of the Waterproof Coating over the tape and remaining wall area up to the required height.
Dunlop Matting is also included in the kit and should be applied over the floor area as per the tape, before applying a second waterproof coating over matting to achieve complete coverage.
Just be aware that Dunlop Shower Waterproofing Kit should not be used as a finished or wearing surface.
When choosing your tile adhesive, a ready-mixed product such as Dunlop RX-3000 Waterproof Wall Tile Adhesive should be sufficient. We would recommend fixing 1m2 at a time – or about 30 minutes working time. In wet areas always ensure that no voids are left in the adhesive beneath the tiles. Lift your tiles occasionally to ensure adequate contact is being made.
Once your tile adhesive is dry, a minimum of 24 hours with Dunlop RX range (or a flexible Dunlop cement based adhesive can be used to speed up the job), you can begin grouting. Grout with a flexible grout such as Dunlop GX-500 Grout, which allows for any movement. New from Dunlop, GX-500 is available in eight colours – Polar White, Jasmine Cream, Harvest Beige, Sahara Sand, Conker Brown, Mist Grey, Graphite Grey and Liquorice Black
To finish your tiling, use colour-matched Dunlop FX-90 Silicone Sealant to seal any corners and joints around the shower area.
Want more tiling advice? Take a look at the Dunlop Blog – here we take some of the best tweets we get, and turn them into helpful tips and advice.