Showing 7–8 of 8 results
tile on concrete
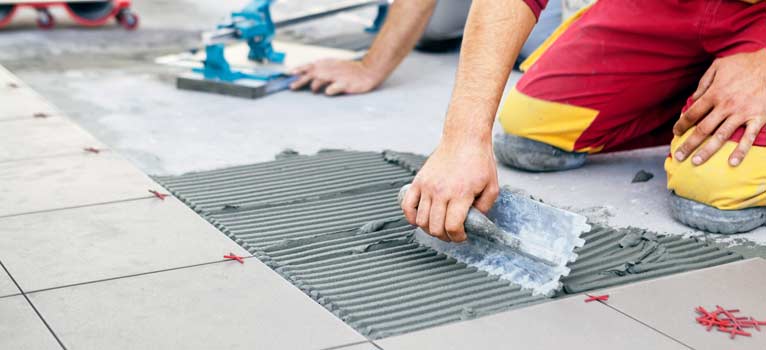
How to tile on a concrete substrate
Whether you’re planning to tile a patio, swimming pool surrounds, or an outdoor entertainment area, external tiling presents unique challenges; from ensuring adequate drainage, and frost resistance to selecting materials that can withstand the British weather. Here you’ll find trusted products, and practical guidance to help you achieve a lasting, professional finish on your external tiling project.
Tiling on Concrete FAQS
Q: How long before I can walk on newly tiled concrete floors?
Timing depends on the adhesive used:
- DUNLOP CF-03: Allow 3 hours before light foot traffic
- DUNLOP CF-24: Allow 24 hours before light foot traffic
- DUNLOP CLF-03: Allow 3 hours before light foot traffic
However, full curing takes longer. For best results, avoid heavy traffic for at least 7 days.
Q: What if my concrete floor has underfloor heating?
Concrete floors with underfloor heating require additional considerations:
- Commission the heating system before tiling
- Switch off the heating at least 48 hours before tiling
- Use DUNLOP LX-200 FLEX LEVELLER or DUNLOP LX-360 FIBRE LEVELLER if leveling is needed
- Consider installing DUNLOP PROCOVER UNCOUPLING MAT for added security
- Use a flexible adhesive like DUNLOP CF-03 or DUNLOP CF-24
- Allow at least 2 weeks after completion before turning the heating back on
Q: Can I use PVA to prime concrete before tiling?
PVA is not recommended as a primer for tiling on concrete. Adhesive manufacturers specifically advise against using PVA as it can:
- Create a barrier that prevents proper bonding of tile adhesive
- Re-activate when wet, potentially causing tiles to come loose
- Void product warranties
Always use a proper tiling primer like DUNLOP TILERS PRIMER or DUNLOP SBR UNIVERSAL BONDING AGENT.
Q: Is my concrete floor suitable for tiling?
Most concrete floors make excellent bases for tile installation. Check that your concrete is structurally sound with no major cracks or movement. Minor hairline cracks can usually be repaired before tiling. For newly laid concrete, ensure it has fully cured – typically allow at least 6 weeks for new concrete before tiling.
Q: How do I check if my concrete floor is level enough for tiling?
Use a long spirit level or straight edge placed at various points across the floor. If you find gaps under the straight edge greater than 3mm, you’ll need to level the floor before tiling. DUNLOP LX-360 FIBRE LEVELLER, LX-200 FLEX LEVELLER, or LX-40 FLOOR LEVELLER can help create a perfectly level surface.
Q: Does concrete need to be primed before tiling?
Yes, concrete should be primed before tiling. Concrete is porous and will absorb moisture from the adhesive too quickly if not primed. DUNLOP MULTI PURPOSE PRIMER diluted 1:1 with water creates an ideal surface for adhesion while controlling absorption.
Q: How do I prepare an existing concrete floor for tiling?
- Thoroughly clean the surface, removing all dust, grease, and loose particles
- Repair any cracks or damage with an appropriate filler
- Remove any paint, sealers, or adhesive residue that could affect adhesion
- Sweep and vacuum the surface to remove all dust and debris
- Prime with DUNLOP MULTI PURPOSE PRIMER diluted 1:1 with water
Q: What about cracks in my concrete floor?
Small, stable hairline cracks (less than 2mm) can be filled with an appropriate concrete repair product. For larger cracks or those that indicate structural issues, you should consult a professional builder. Active cracks that continue to move will likely transmit through to the tiles over time.
Q: Which DUNLOP leveller should I choose for my concrete floor?
- DUNLOP LX-360 FIBRE LEVELLER: Ideal for deep-fill applications (3-60mm), fibre-reinforced for extra strength and flexibility, perfect for challenging concrete floors
- DUNLOP LX-200 FLEX LEVELLER: For depths of 0-20mm, built-in polymer for flexibility, suitable for most standard concrete floors
- DUNLOP LX-40 FLOOR LEVELLER: Economical choice for basic levelling from 2-12mm, perfect for minor corrections to relatively good concrete floors
Q: How long do I need to wait for floor leveller to dry?
Drying times vary by product and application depth:
- DUNLOP LX-360: Walkable after 3 hours, tile after 4 hours
- DUNLOP LX-200: Walkable after 3 hours, tile after 4 hours
- DUNLOP LX-40: Walkable after 4 hours, tile after 4 hours Always check that the leveller is completely dry before tiling.
Q: What tile adhesive should I use on a concrete floor?
For tiling onto concrete floors, we recommend either:
- DUNLOP CF-03 FLEXIBLE FAST SET TILE ADHESIVE: Ideal when you need to grout quickly (after just 3 hours), perfect for rapid completions
- DUNLOP CF-24 FLEXIBLE TILE ADHESIVE: Offers a longer working time (5 hours), giving you more time to ensure perfect positioning for larger areas
Q: What size notched trowel should I use on concrete floors?
The trowel size depends on the tile size:
- For tiles up to 30x30cm: 10mm notched trowel
- For tiles over 30x30cm: 12mm or larger notched trowel Larger tiles require more adhesive for proper support and bonding.
Q: How much tile adhesive will I need?
For DUNLOP CF-03 or CF-24, one 20kg bag will cover approximately 5m² when using a 10mm notched trowel. Coverage will vary depending on the trowel size, the evenness of the substrate, and the tile size.
Q: What's the best way to cut tiles for a concrete floor?
For straight cuts, use a manual tile cutter for ceramic tiles or a wet saw for porcelain and natural stone. For L-shaped cuts around corners or obstacles, use a wet saw or tile nippers. Always wear appropriate safety gear, including eye protection and gloves.
Q: Can I install underfloor heating on a concrete floor before tiling?
Yes, electric underfloor heating systems can be installed on primed concrete before tiling. First apply a suitable DUNLOP levelling compound like LX-360 FIBRE LEVELLER to create a flat surface, install the heating system according to manufacturer instructions, then cover with another layer of levelling compound before tiling.
Q: When can I grout tiles on a concrete floor?
With DUNLOP CF-03 FLEXIBLE FAST SET TILE ADHESIVE, you can grout after just 3 hours. If using DUNLOP CF-24 FLEXIBLE TILE ADHESIVE, wait 24 hours before grouting. Always ensure the adhesive is fully set before grouting.
Q: How soon can I walk on newly tiled concrete floors?
With DUNLOP CF-03 FLEXIBLE FAST SET TILE ADHESIVE, light foot traffic is possible after 3 hours. With DUNLOP CF-24 FLEXIBLE TILE ADHESIVE, wait 24 hours before walking on the floor. For heavy furniture or appliances, wait at least 72 hours regardless of the adhesive used.
Q: How do I clean and maintain tiled concrete floors?
Regular cleaning with warm water and a pH-neutral cleaner is sufficient for most tiled floors. Avoid acidic or abrasive cleaners that can damage grout or tile surfaces. Consider using a penetrating sealer on natural stone tiles and grout lines in high-traffic areas for easier maintenance.
Remember that properly preparing your concrete floor before tiling is the key to a successful installation. The DUNLOP system of products – from MULTI PURPOSE PRIMER to levellers, adhesives and grouts – is designed to work together to ensure your tiled floor looks great and lasts for years to come.

How To Guide
Download this handy how-to guide for external floor tiling, offering a simple step-by-step overview covering:
- Base preparation
- Surface Preparation
- Mixing and applying the adhesive
- Fixing and finishing the tiles
Top tip
“Always take the time to check for moisture problems first – concrete may look dry on the surface, but it can still hold moisture that will affect adhesion. After a thorough cleaning, apply DUNLOP MULTI PURPOSE PRIMER and see how it’s absorbed. If it disappears immediately, it’s a sign that your concrete is very porous and may need a second coat. And remember, if you’re using our levellers, the investment in preparation will pay off in the finished floor – rush this stage and you’ll see every imperfection reflected in your tiles for years to come.”
David Rowley – Dunlop Adhesives Training Manager